When we found out that our first child was going to be a girl, wooden letters spelling out the baby’s name was just becoming popular…or maybe it had been but I wasn’t aware because it wasn’t something I had looked into. I didn’t like the plain ol’ choices they had in stores so I went online (which I did a lot during my 11 weeks of bed rest) in search of pretty wooden letters for my baby girl. Her room was lavender on the bottom part of the wall and a pale, sunny yellow on top so I wanted my husband to paint the letters the same lavender so they would pop off the yellow. Through my search I found someone who sold different sizes with a lot of font choices and I chose a girly-looking one. We painted them and hung them up with Command picture hanging strips. I was so happy with what we had done!
For our second child, a boy, I could NOT decide on a theme for him. Part of the problem was that we were living in a two-bedroom condo so he would be in our room, which was already painted a sage green. I wanted to be crafty for him so I decided to buy one of those quilt panels that’s basically done besides sewing some binding around the edges. He needed something to go with it though so I painted one of the animals for him to hang up.
Then, when my son was 5 1/2 months, we put our condo on the market and went in search of a new home. We decided on new construction with 4 bedrooms and now I had to decide how I was going to do his first, very own room! My sister had given him a quilt when he was baptized from Things Remembered and I decided to go with that and blue and yellow paint for his walls…but I needed accessories! I painted two simple canvases for him and found star hooks, which I also painted, to hang his quilt from the wall.
We knew that we wanted a third child and had thought that since we already had a boy and a girl that the gender of this third child could be left a surprise! On my son’s 2nd birthday, I found out I was pregnant with our third child 🙂 We went along telling everyone that we were gonna leave this one a surprise and I really wanted to…until it got closer to being able to find out and I was stressing about how to decorate the nursery and what kind of clothes to get…so we found out – it was time to start planning for our baby boy!
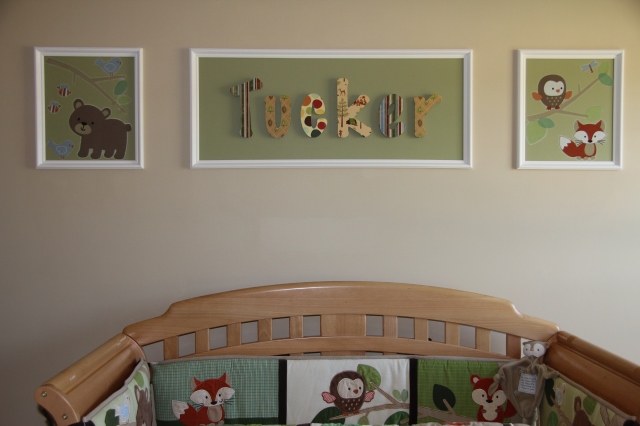
I wanted to do wooden letters spelling out his name like we had done for our daughter. The wooden letter thing has really taken off and there were a lot of sites selling them already painted and/or decorated but I figured, “hey, I can do that!” I found someone on Etsy that had wooden letters at a great price, different sizes and different fonts…and she was fast!
I had decided on Carter’s Tree Tops crib bedding, so now that I had a theme, I had to pick out some coordinating scrapbook paper. Once again, I scoured the internet and bought my supplies from this site. It really is easy to make your own coordinating letters for your little ones room!
Here is what you will need:
- wooden letters
- paint (if you choose to, you can paint the sides of the letters with the wall paint or another coordinating color)
- scrapbook paper
- Mod Podge (I used the gloss Mod Podge but you can also use the matte if you don’t want your letters to have a sheen)
- small foam brushes
- fine grit sandpaper
- small scissors or craft knife
- pencil
Here is what to do:
- If you wish, sand the sides of the letters and paint
- After they are dry, turn your scrapbook paper upside down and the letter you’re working with backwards and trace around the letter with a pencil (the paper and letter should be facing the correct way when turned over)
- Cut out the paper just inside your pencil line using scissors or craft knife (I found it easier to use small, sharp scissors)
- Apply a thin layer of Mod Podge onto the wooden letter with a foam brush and line up the paper letter over it and press it on and rub, rubbing out any air bubbles
- Work on your other letters
- Wait about 15 minutes and if there is any paper over the edge of the letters, lightly sand it off
- Next, you can put your first coat of Mod Podge over the paper. Make it as smooth as possible with your foam brush.
- I put 2 coats of Mod Podge over the paper, making sure to let the first coat dry thoroughly (about 30 min). I like the “brush” strokes that the foam brush leaves but if you would prefer yours smoother, then lightly sand between coats.
- The surface will remain very slightly tacky…I didn’t mind but if you do then just spray with a clear acrylic.
Just as we did with our daughter’s, we hung the letters with the Command picture hanging strips. Have fun!


