Shelly’s Banana Chocolate Chip Oat Muffins

So it’s looking like I’m going to write an entry about every 2 months or so 😛  The plan going into this was to keep up with it so much better but, what is it they say, “best laid plans…”?  A lot of the problem is that I do things in such a hurry so I can beat the end of Tucker’s nap or squeeze in a workout that I don’t remember to take pictures of the process.  I could just write something up quickly for things but pictures make it so much more interesting and helpful!

This entry is inspired by a blog post that my friend, Beverly, over at Saucy Mommy, wrote recently.  She wrote up an entry (including nice step-by-step photos…see, interesting and helpful and made me wanna try) for Banana Oat Bran Chocolate Chip Muffins.  Perfect timing!  I had 4 VERY ripe bananas sitting on the counter that were about to find themselves in the garbage (or sliced and frozen for smoothies).  I didn’t want to slice up mushy bananas and the muffins looked so good so muffins it was!

For two months now, I have really been trying to eat healthy and exercise 5-6 days a week.  More recently, I’ve started “running”.  The last time I tried running I really hurt my knee and switched to other types of exercise.  So I’m starting out slow.  I’m up to running 5k but I walk and jog so it takes about 38 minutes.  I’m also about to invest in my first pair of good running shoes and I hope to sign up for a 5k at the end of October!  Now, it’s even more important to me to try and eat healthy.

I liked the bones of the Banana Oat Bran Chocolate Chip Muffins but I wanted to try some things.  The recipe called for sugar and 1) I didn’t have enough, 2) I didn’t want to use sugar (I consume enough as it is).  The recipe also called for eggs.  While I have nothing against eggs, and often include them in my breakfast, I wanted to try something…ground flax seed “eggs”.  Also, there were some things I didn’t have, like whole wheat flour.  I have a lot of different flours and thought I had some whole wheat but after already getting things started I discovered I didn’t have any.

After all is said and done, here is my recipe for Shelly’s Banana Chocolate Chip Oat Muffins 🙂  My son enjoyed one and I later had one for a snack, lightly toasted with a smidge of cinnamon butter on top.  I enjoyed the muffin…moist, dense (but by no means hockey puck status), good texture and good flavor.  There was a bit of a bitter undertone which I couldn’t put my finger on.  I didn’t use whole wheat flour so it wasn’t that.  Maybe the flax?  Maybe using honey instead of sugar?

Shelly’s Banana Chocolate Chip Oat Muffins (inspired by Saucy Mommy)

Makes 18 muffins (185 calories each)

  • 1 c. oats (the original called for rolled oats or oat bran – I only had quick oats…boooo)
  • 2/3 c. unsweetened vanilla almond milk (or milk of your choice)*
  • 2 c. all-purpose flour
  • 1/3 c. honey
  • 5 tsp. baking powder
  • 1 tsp. baking soda
  • 1 tsp. salt
  • 1/2-3/4 tsp. cinnamon (I like cinnamon so I added 3/4 instead of 1/2)
  • 1/2 c. butter, melted and cooled
  • 2 flax “eggs” (2 Tbsp. of ground flax mixed with 6 Tbsp. water, microwave for 30 sec. and let cool)
  • 2 tsp. vanilla
  • 2 cups mashed bananas (I had 4 small bananas so that’s what I used…don’t know how much it actually was but looked to be about 2 cups)
  • 1/2 c. chocolate chips

Instructions

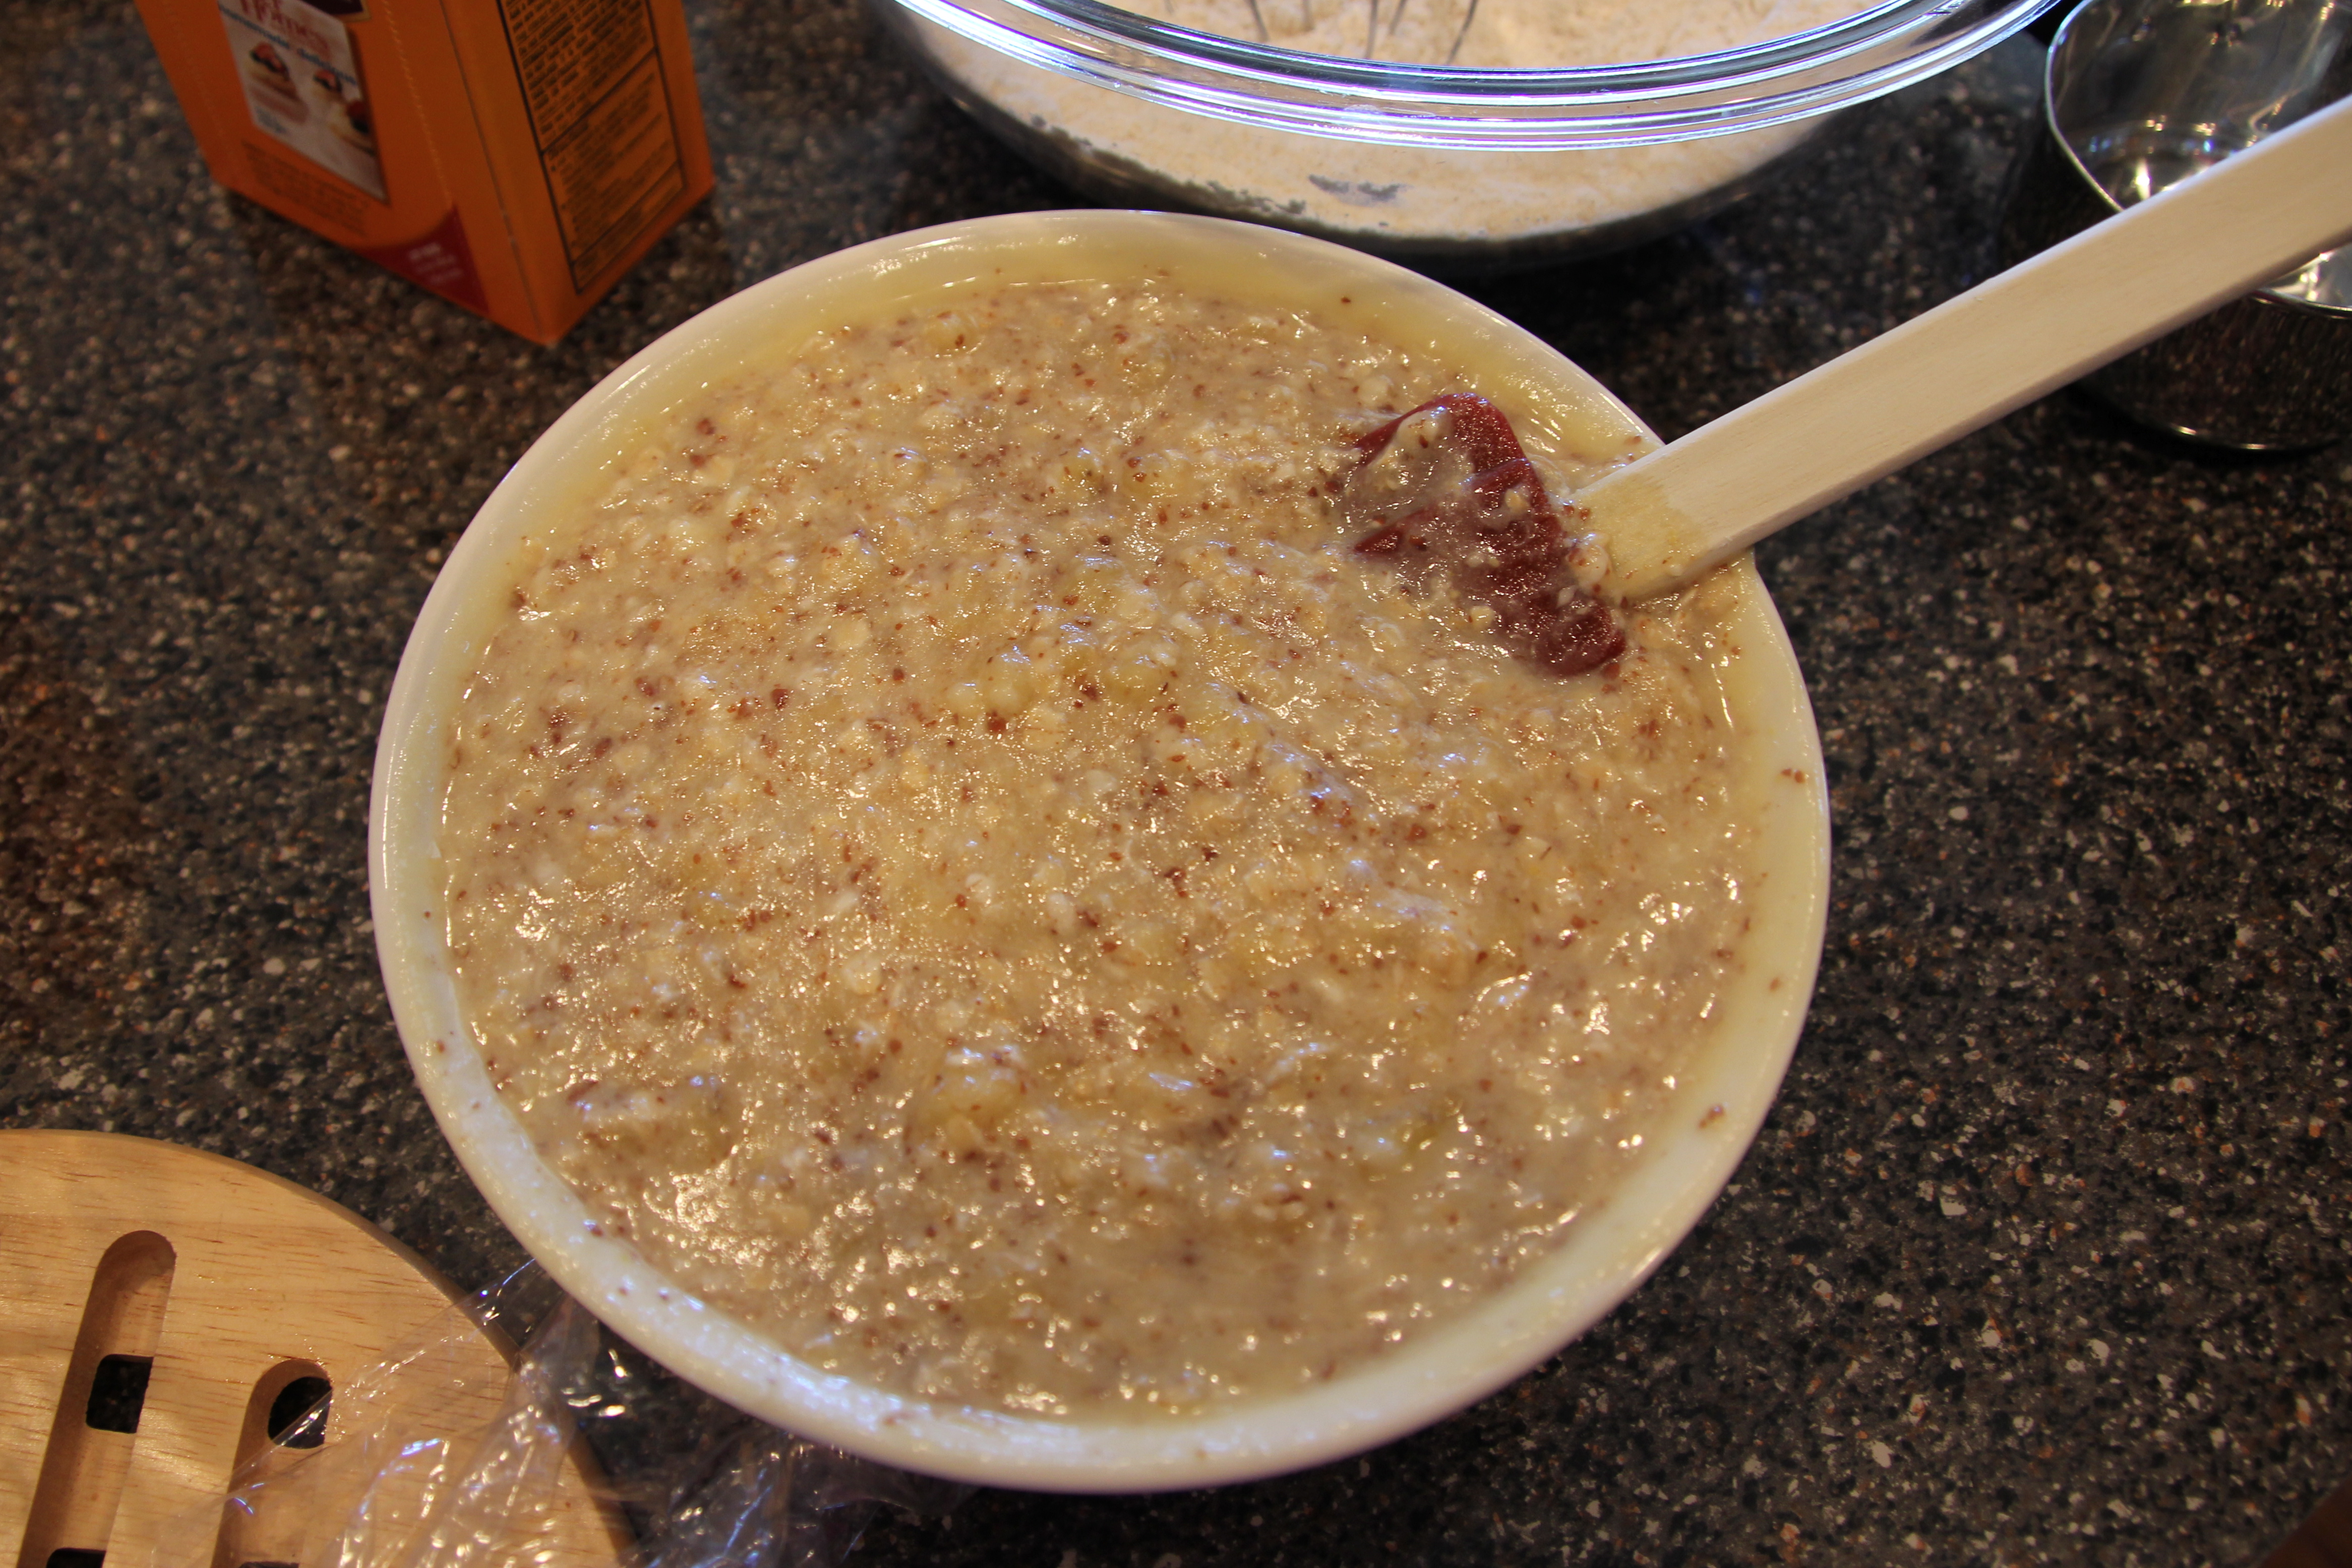
Combine oats and almond milk (or milk of choice) in medium bowl and set aside.

Image

Meanwhile, in a large bowl, combine flour, salt, baking powder, baking soda, and cinnamon. It is important to whisk dry ingredients when baking to break up any clumps and incorporate the ingredients well.  Preheat the oven to 375 degrees.

Add the melted butter, flax “eggs”, honey, vanilla and mashed bananas to the oat and milk mixture. Stir with a wooden spoon to gently combine.

Image

The flax “eggs”

Image

I, obviously, did not start out with a big enough bowl when mashing my bananas 😉

Pour the wet mixture into the bowl of dry ingredients, and add the chocolate chips. Gently fold everything together until the flour is moistened – do not over mix.  My batter seemed a tad on the dry side.  I cut back on the almond milk because, when you replace sugar with honey in a recipe, you are supposed to reduce other liquids.  *I would recommend maybe doing 3/4 c. milk instead of the 2/3 c. I did.

Image

Grease or line your muffin tins, fill the tins and bake for 18-20 minutes.  Mine took 18 min.  Make sure you put a little water in any empty muffin cups to keep the muffins moist.

Image

Let the muffins cool in the muffin tin for five minutes and then remove them from the tin and let them cool on a wire rack.

Image

Yummmmm 🙂

Image

Under the Sea 6th Birthday Party

After a little over two months, I’d say it’s high time for a blog entry!!!  I blame the sparseness of my entries on the “chaos”!  Let’s see if I even remember how to do this 😉

My daughter just celebrated her 6th birthday and I was hoping she’d pick a fun theme.  She’s been into ocean life lately so it was easy to persuade her to do an Under the Sea theme…nice and summery!  I found and bought her party supplies through Birthday Express, a site I use often for the kids’ birthdays.  I also ordered her cake pan through Amazon.  Then, I proceeded to order favors from Birthday Express and Oriental Trading Co.  I was very excited because I hadn’t really had the opportunity to go all out for one of Hannah’s parties.  Either I was pregnant or had an infant or I just wasn’t into cake-making yet…so this was gonna be the one to do it!

As I was planning her party, I decided I wanted some fun decorations but I had already ordered all of her stuff and there wasn’t enough time to order more decorations (I had just ordered some balloons and a small centerpiece).  The idea was born to turn our morning room into the ocean and I made the decorations.

I took as many pictures as possible but the ones of the decorations didn’t really do them justice.  The cake was the most difficult I’ve done.  Not as many colors as others but it wasn’t a Wilton pan so I didn’t really have pictures of sample cakes to guide me, which Wilton has on the label of the cake pan.  The cake pan was also small so I made cupcakes and Sand…we’ll get to that 🙂

O.K., onto pictures, instructions and recipes!  I hope it inspires some creative party-throwing!

ImageImageImage

I drew and colored in the sea animals to coordinate with her theme (except for the starfish because I’m horrible at drawing stars, the seahorses and the hermit crab…I traced those).  Then, I drew waves on oaktag and cut it out and drew a second set of waves below them and outlined in blue glitter glue.  I taped the waves to the windows, covered in blue iridescent cellophane (like you wrap gift baskets in), and then used double-sided sticky dots to attach the animals on top of the cellophane.  The cellophane gave the room a bit of a blue effect when the sun was shining through 🙂

ImageImage

The sand dessert – complete with bucket and shovel to serve it with!  You wouldn’t believe how much this looks like sand!!!  I got the idea/recipe from here.  It was absolutely delicious and sinful and the only thing I would change next time is to omit the half stick of butter…I’m not quite sure what purpose it served and I think it would be just as sinful and delicious without.

1 pkg Vanilla Wafers
3 or 4 Oreos
8 oz Cream Cheese
1/4 C Butter
2/3 C powdered sugar
2 small pkgs French Vanilla pudding mix
2 3/4 C Milk
12 oz Cool Whip

Crush Oreos and Vanilla Wafers in a food processor.  In a separate bowl, cream together softened 8 oz cream cheese, butter, and powdered sugar. In another bowl, mix pudding with milk.  Add to cream cheese mixture.  Fold in cool whip.  Layer into buckets with sand, pudding, sand etc.

Image

For the cake and cupcakes, I used a recipe from here.  I always use this cake recipe now…it is sooooo good and I always get compliments on it!  I got the idea for the fish cupcakes on Pinterest.  You can find the instructions here.  I did not dye my frosting to match the M&Ms because, well, I was just sick of dying frosting after the cake!

My daughter had a great time and that made me so happy 🙂

English Muffin Bread

When you’re pregnant, there are all of these silly ways to try and determine what gender you’re having.  You can try to predict the gender using a Chinese gender chart and there are quizzes all over the internet with questions like, “do you prefer sweet or salty treats?”, “does your leg hair grow back more slowly or faster after shaving?”, “do you like the heel of bread?”  What any of these things have to do with whether you’re carrying a bouncing baby boy or a little princess is beyond me…but they’re fun to take 😉

Whether I’m pregnant or not, the answer to “do you like the heel of the bread?” is always a resounding, “no!”  I look at the heel of the bread as just a protective layer for the rest of the bread.  It’s job is solely to keep the rest of the bread from drying out.  I enjoy a thin layer of crust around my bread but I don’t always eat that, either.  Yes, I’m still a 5-year-old at heart that would rather not eat the crust of her sandwiches.  Until now…until this bread!

I have been on a real bread-making kick.  I do it all by hand…mix the ingredients with a spoon, knead it, and shape it into loaves.  I have the appliances that could do this stuff for me but, hey, it’s a good arm workout and I find it relaxing and the result most often rewarding and delicious.  I’m also too lazy to drag these things out but I didn’t know I’d be into bread-making this much so I think it’s high time I do so 🙂

I use King Arthur Flours and this is the third recipe from their site that I have made.  Recently, I made their Vermont Whole Wheat Oatmeal Honey Bread – that was delightful.  I have also made their Classic 100% Whole Wheat Bread two ways; following the original recipe and then using their suggestion of substituting some orange juice for some of the water (I liked it the second way better).  Today, I made the English Muffin Toasting Bread…and I ate the heel…and it was wonderful!

Another plus to this bread, besides it’s wonderful taste, is that it is so easy!  Mixed the dough with a hand mixer (should have used my stand mixer with paddle attachment – gonna have to dig some dough out of my hand mixer), spooned it into the prepared pan and let it rise once.  My bread did not rise as much as the recipe said it would but this was not the recipe’s fault – I made changes.  Even with the changes and a not-so-tall loaf, this is still my favorite bread that I’ve made so far.  There will be others though!  I already have one in mind that I want to try next 🙂

English Muffin Toasting Bread

Ingredients

  • 3 cups King Arthur Unbleached All-Purpose Flour*
  • 1 tablespoon sugar
  • 1 1/2 teaspoons salt
  • 1/4 teaspoon baking soda
  • 1 tablespoon instant yeast**
  • 1 cup milk
  • 1/4 cup water
  • 2 tablespoons vegetable oil or olive oil
  • cornmeal, to sprinkle in pan

Directions

1) Whisk together the flour, sugar, salt, baking soda, and instant yeast in a large mixing bowl.

2) Combine the milk, water, and oil in a separate, microwave-safe bowl, and heat to between 120°F and 130°F***. Be sure to stir the liquid well before measuring its temperature; you want an accurate reading. If you don’t have a thermometer, the liquid will feel quite hot (hotter than lukewarm), but not so hot that it would be uncomfortable as bath water.

3) Pour the hot liquid over the dry ingredients in the mixing bowl.

4) Beat at high speed for 1 minute. The dough will be very soft.

5) Lightly grease an 8 1/2″ x 4 1/2″**** loaf pan, and sprinkle the bottom and sides with cornmeal.

6) Scoop the soft dough into the pan, leveling it in the pan as much as possible.

7) Cover the pan, and let the dough rise till it’s just barely crowned over the rim of the pan. When you look at the rim of the pan from eye level, you should see the dough, but it shouldn’t be more than, say, 1/4″ over the rim*****. This will take about 45 minutes to 1 hour, if you heated the liquid to the correct temperature and your kitchen isn’t very cold. While the dough is rising, preheat the oven to 400°F.

8) Remove the cover, and bake the bread for 22 to 27 minutes, till it’s golden brown and its interior temperature is 190°F.

9) Remove the bread from the oven, and after 5 minutes turn it out of the pan onto a rack to cool. Let the bread cool completely before slicing.

*I replaced 1/2 c. of the unbleached all-purpose flour with white whole wheat flour.

**I only had active dry yeast (I really have to get some instant yeast, too).

***Since I was using active dry yeast, which calls for lukewarm water between 100-110 degrees, I heated the liquids to 115 degrees in hopes of not ruining the yeast but also making the liquid almost hot enough.

****Another thing I really need to get is a slightly smaller loaf pan because mine is 9″ x 5″.  This may not seem like a big difference but it can affect things during rising and baking.

*****Due to the changes I made, different yeast, liquid slightly too warm for the yeast and cooler than what the recipe called for, and a slightly larger pan size, my dough was probably about an inch or so below the rim of the pan.


Normally, I spoon my flour into the measuring cup and level it off. With this recipe, after reading some reviews, I decided to sift the flour before spooning it into the measuring cup and leveling off.


All dry ingredients whisked together.


Pan greased, coated in cornmeal and ready for dough.


The dough will be very sticky!


Before rising. I found that greasing my hands and spreading out the dough worked pretty well.


After rising.


I baked mine for 22 minutes.


Yum!


Toasted up with some of my homemade peanut butter spread on 🙂

Tutu Tutorial

A couple years back, tutus became very popular!  I bought my little girl a couple here and there from various kids’ clothing stores that I frequented…mostly ones on sale.  Then, I was introduced to Etsy, an online site where you can buy and sell handmade items or supplies so you can get crafty.  I started seeing a lot of people selling handmade tutus on Etsy and they were expensive…some were selling theirs for as much as $50!

At first, I thought to myself, “I’m sure I could make tutus and make a nice chunk of change like all of these people.”  I proceeded with a Google search to see how to make these adorable tutu skirts so girls all over could look like the princesses/ballerinas they dreamed of being.  There are a few different ways to do them and I gathered the info I needed from videos on YouTube.

Then, reality (and chaos) smacked me upside the head.  I didn’t have time to be churning out these tutus!  They’re not terribly time-consuming or difficult but the thought of orders coming in and the pressure of filling them got the better of me.  I could certainly make them for special girls in my life though!

My first tutus were for my dear friends’ daughters for Christmas.  I didn’t want to just make them tutus though so I made them shirts to go with them 🙂

Image

Image

Next up, a tutu for my special girl 🙂  The NY Giants were in the playoffs and she needed a tutu to show off her team spirit!  This tutu was also worn for their Super Bowl win and extra-added bonus…she can wear it for 4th of July.

Image

Would you like to know how to make a tutu for the special little girl in your life?  Next up, is an Easter tutu for my daughter, and I’ll show you how!

Supplies: (I purchase my supplies from fabric.com…they have a great selection and really good prices)

  • tulle (I purchase the 6″ wide spools that fabric.com sells…these will make your tutu making experience sooooo much easier)
  • elastic (mine is 3/4″ no-roll; you can go up to 1″ but I wouldn’t do any wider than that)
  • good, sharp scissors
  • cardboard cut to your desired length (you’ll see…)
  • needle & thread (don’t worry…there is just a smidge of sewing)
  • 2 rubber bands or large hair elastics (has to fit around the cardboard)

Image

How-To:

  • Decide on the length of your tutu and then double that.  For my 5 1/2 yr. old daughter, I wanted the skirt to be roughly 10″ and for my friends’ girls, who at the time were 2 and 4, I did tutus that were about 9″.
  • Get yourself a sturdy piece of cardboard that is at least 8″ wide and cut it to double the length you want the finished tutu.
  • Take a roll of tulle and wrap, wrap, wrap it around the cardboard.  Don’t wrap too snugly because you want to be able to slip your scissors in easily.  Just do the whole roll.  If you have extra, you can store it in a bag labeled with the length for future tutus!

Image

  • Place a rubber band around each end of the cardboard so that the tulle is held securely in place.

Image

  • Cut through all the layers at each end.  Make sure not to pull up as you’re cutting or your tulle will come out different lengths (if they are slightly different it’s not going to be noticeable so don’t stress too much).

Image

  • Voila!  A bunch of strips of tulle cut with a couple easy steps!  I cannot take credit for this great trick…I saw it on YouTube.  I wish I could remember where so I could give credit 😦

Image

  • Cut your elastic to the size you need.  Either wrap it around the intended recipient and allow for slight overlap to sew it into a circle or measure the girl’s waist and cut to length, adding a bit for overlap.
  • Sew the ends of the elastic together to form a waistband.

Image

  • Place the elastic around your thigh.  Yup.  This is the easiest way to keep it somewhat still while you get all your tulle on.
  • Take a piece of tulle and kind of gather it and fold it in half so you have a loop on one end.  You’re going to be making a slip knot around the elastic.

Image

  • Place the piece of tulle under the elastic with the loop facing you.
  • Wrap the ends over the elastic and pull through the loop.

Image

Image

  • Pull snug!

Image

  • Continue along your merry way 🙂  The closer together you put the tulle, the fuller your tutu will be.

Use one color…2…5…team colors, holiday colors…the possibilities for cuteness are endless!

Oui-Oui!

I have a love affair with Nordstrom Cafe’s French Dip sandwich!  I’ve had several others and none really compare.  Nordstrom Cafe’s has a delicious garlic aioli and the beef is tender and flavorful…mmmmm!  I got an email from allrecipes.com with a recipe for Easy Slow Cooker French Dip and I figured, “sure, why not?”  The reviews were great and plentiful with many suggested variations on the original recipe.

Feel free to check out the original recipe but I highly recommend that you follow mine (or something close to it).  Unfortunately, when I deviate from a recipe, I kind of just throw things in and don’t measure but I will try to approximate 🙂  The result was tasty but I still need to play around with it…it could have been better.  For one, I did not pay attention to the fact that the recipe called for the beef to be in the slow cooker on low for 7 hours…I didn’t have 7 hours so I did mine on high for about 4 hours.  I am not sure if the meat would have been more tender if I had done low for 7 hours or if I had used the exact cut of meat called for or if I were a deli with a big meat slicer that could have sliced the meat thinner than I could with my largest and sharpest chef’s knife.

I don’t want to share only complete successes with you.  There are plenty of us out there that try a recipe and fail.  Well, I wouldn’t call this a fail but it did not meet my high expectations.  The au jus could have been saltier (maybe I shouldn’t have used fat-free, low-salt beef broth) and I could have melted a bit more provolone over the top when assembling the sandwich.  I bet this recipe would benefit from seasoning the meat liberally with salt, pepper and garlic powder and then searing in a pan before placing in the slow cooker.  The true saving grace was the garlic aioli I made…follow this recipe exactly!

O.K., so let’s get to the recipes!

Easy Slow Cooker French Dip (adapted from allrecipes.com)

Ingredients

  • 4 pounds rump roast (I used a 3 pound eye of round beef roast)
  • 1 Tbs. garlic powder (more or less to taste)
  • Salt
  • Pepper
  • 1 (10.5 ounce) can beef broth
  • 1 (10.5 ounce) can condensed French onion soup
  • 1 (12 fluid ounce) can or bottle dark beer
  • Several shakes of worcestershire sauce
  • French rolls (I just cut up a long baguette)
  • Provolone cheese (optional)
  • Garlic aioli (optional, recipe below)

Directions

  1. Trim excess fat from the rump roast, and place in a slow cooker*. Sprinkle with salt, pepper and garlic powder to-taste. Add the beef broth, onion soup, worcestershire sauce and beer. Cook on Low setting for 6.5 hours. Remove the roast, cover with foil and let rest 10-15 min. Slice the meat across the grain and return to the slow cooker for an additional 30 min.
  2. Split French rolls and place the meat and provolone on one side and place under broiler until cheese is melted. Spread the garlic aioli on the other half of the roll.
  3.  Put the sandwich together and serve with the au jus for dipping.

*I would recommend seasoning the roast liberally with salt, pepper and garlic powder and searing in a pan before placing in slow cooker.

Garlic Aioli (from allrecipes.com)

Ingredients

  • 3/4 cup mayonnaise
  • 3 cloves garlic, minced (I just used my garlic press)
  • 2 1/2 tablespoons lemon juice
  • 3/4 teaspoon salt
  • 1/2 teaspoon ground black pepper
 Directions
  1. Mix mayonnaise, garlic, lemon juice, salt, and pepper in a bowl. Cover and refrigerate for at least 30 minutes* before serving.
*It is very important to let the aioli sit in the refrigerator for at least 30 min. so the flavors can come together and the tartness of the lemon juice can blend in and lose some of it’s bite.

Let Them Eat Cake!

For my son’s 2nd birthday, I decided to try my hand at using a Wilton shaped cake pan.  Not sure why it was this particular birthday that made me decide to do this but he had a thing for trains and that was the theme so I was going with it!  I had seen a couple people do it for their kids and figured, “I can do that!”

I wasn’t going to make things more difficult on myself and try to make a cake from scratch so I just used a boxed cake mix.  I also purchased Wilton Ready-to-Use Decorator Icing and gel icing colors.  I also recently started using the icing tubes if I need a deep color like red or black.  I have made a couple cakes since my son’s train cake and even ventured into one involving cupcakes and a small round cake and a semi-homemade one that was so moist and delicious!

I don’t have any “during” pictures but enjoy the pictures of the results 🙂  I hope they inspire you to try some cakes for your special someone(s)!

My first cake!


Cake I made for a friend's baby shower


This is the cake using the delicious semi-homemade batter.


Hungry Caterpillar for a special girl in my life 🙂


“Hon, Did You Get Take-Out?”

Nope!  It’s Slow Cooker Mongolian Beef.  As promised nearly a week ago, I want to share a recipe from Saucy Mommy…a very delicious, simple recipe!  I’ve already made this dish twice and I have the ingredients to make it again soon.  I could eat this a LOT and the leftovers are just as wonderful 🙂

I’ve attempted to make Chinese food at home a couple times in the past but often the results aren’t that great.  I have a pan very similar to a wok and the fast-paced cooking at a high temp just stresses me out and the meat always ends up dry or tough…not an issue with this dish!  This yummy meal is prepared in your slow cooker (loving my new slow cooker) so there is no stress involved and the meat comes out so tender.  I really enjoyed it over brown rice spaghetti but you can find noodles in the Asian aisle at your supermarket or serve it over rice…or just eat it right out of the slow cooker 😉

If you get a chance, you should really head on over to Saucy Mommy.  She has great recipes and, if you have kids, there are a lot of lunch ideas to get you out of those lunchbox ruts 🙂

Slow Cooker Mongolian Beef

Ingredients:

  • 1 pound flank steak, cut into bite-size strips (I have also used skirt steak – both are delicious but I enjoy the texture of the flank steak a bit more)
  • 1/4 cup cornstarch
  • 2 teaspoons olive oil
  • 1 onion, thinly sliced
  • 1 tablespoon minced garlic
  • 3-5 large green onions, sliced diagonally into 1/2 inch pieces*
  • 1/2 cup soy sauce
  • 1/2 cup water
  • 1/2 cup brown sugar
  • 1/2 teaspoon minced fresh ginger root**
  • 1/2 cup hoisin sauce

*The recipe calls for 3 but I like a bit more in mine because I don’t garnish the dish with the green onions after it is done but you can.

**I don’t love ginger or dealing with ginger.  The first time I made it, I didn’t use it and it was delicious.  The second time I made it, I used it…and it was delicious 🙂  This one is totally up to you.

Instructions:

Place flank steak and cornstarch into a resealable plastic bag. Shake the bag to evenly coat the flank steak with the cornstarch. Allow to steak rest for 10 minutes.

Heat olive oil in a large skillet over medium-high heat. Cook and stir steak until evenly browned, 2 to 4 minutes. Place onion, garlic, flank steak, green onions, soy sauce, water, brown sugar, ginger, and hoisin sauce in a slow cooker.

Cook on low setting for about 4 hours. When it’s done, ladle over noodles or rice.  I serve mine with a side of broccoli, too.


Mongolian Beef over brown rice spaghetti...and now I'm hungry!

Chaos Ensues

Confession time.  I enjoy cooking.  I enjoy doing crafts.  No modesty here…I usually get pretty good results with both 🙂  I’ve let in the chaos though!  Well, that and laziness.  Even when there were no children in our lives, it was just easier to come home from work and get fast food or take-out.  I swore to myself that once I became a stay-at-home mom there would be no excuse not to cook dinner for myself and my husband (and my children once they were old enough to eat meals).  I went through phases where I would cook and craft a lot.  The desire to cook and do crafts seems to overcome me when I’m pregnant!

For whatever reason, when chaos was at an all-time high…newborn baby boy, 3 year-old son, 5 1/2 year-old daughter, holidays, birthday parties…I decided I would do homemade favors for my son’s baptism and homemade Christmas gifts and go crazy for my son’s 3rd birthday party and start cooking almost every night (I know a lot of you are thinking, “big deal…I have kids and cook every night” but this was new for me) and making breakfasts and desserts.  Oh, and why not start a blog? 😉

My husband is a huge help and works from home a lot and it was easy to get food prepared and do crafts on the weekends while he kept an eye on the kids.  Well, the holidays are over, the big group of birthdays in December have come and gone, my newborn is almost 6 months old, but chaos ensues!  I had an easy newborn.  He threw in a couple curve balls that the other two hadn’t – first cold at 2 weeks old (that’s what happens when you have two older siblings) and extremely fussy in the evenings and the only thing that calmed him was walking around the house or car rides – but he slept a lot and for long periods of time and by 2 months old he was sleeping for like 10 hrs. at night.  Then, teething started and he didn’t handle that quite as well as his sister and brother had and, recently, a growth-spurt that caused evening fussiness again and him waking up in the middle of the night.  Oh, we’re also trying to get him to sleep in his crib and it’s going alright but, well, I’m tired!

The crafting is like non-existent, cooking has fallen to the wayside and my participation in this blog has been lackluster.  The hubby hasn’t been home quite as much lately and dropping the kids off and picking them up from two different schools isn’t helping with me wanting to just be lazy when I am home.  My next blog entry will be less woe is me and will include a recipe from a friend and fellow-blogger, Saucy Mommy, which is easy to get together even when chaos ensues!

Homemade Baby Cereal

I did it!  I made rice cereal for my baby boy 🙂  I really wanted to wait until he was 6 months old to start him on solids but at around 5 months old I realized he wasn’t going to make it.  He still seemed pretty satisfied from nursing but he was watching us eat and drink like a hawk!  When we eat, he watches each bite go into our mouths with his mouth open like a little baby bird.  I decided that, for Valentine’s Day, he would get to try cereal for the first time…and he’s 5 1/2 months old so it’s not too far off from 6 months.  To make it even more special and more nutritious I wanted to make his cereal so I set out to find a method.

I didn’t do extensive research because, well, how many ways could people tell you to make rice into a powder?  I clicked on one of the first sites I saw and read the section on cereal.  If you would like to make your own cereal for your little one, visit this site: Momtastic’s Wholesome Baby Food.  So exciting…fresh, homemade, whole grain cereal for my baby…and any excuse to go to Trader Joe’s to buy groceries is a plus in my book!  Yes, the only ingredient needed besides water is brown rice, but I came home with 3 full grocery bags 😉

I chose to go with an organic brown basmati rice and followed the directions for rice cereal using “powder”.  I poured a bunch of rice into my mini food processor – maybe a bit too much.  You should probably work in batches of about 1/2 cup.  If I had worked in smaller batches, and had just kept at it, the other step I did probably wouldn’t have been necessary.  The step I added was to pull out my small sifter and I would grind the rice for awhile in the mini food processor and then dump it into the sifter over a bowl, sift, dump larger pieces back into the food processor, grind some more, sift, grind, sift, grind…I probably ended up with about 1 1/2 cups of powder.

This morning, I prepared him a bowl.  Here is how (according to the site mentioned above):

Ingredients:

1/4 c. rice powder
1 cup water

Directions:

  1. Bring water to a boil in saucepan.  Add the rice powder while whisking constantly.
  2. Simmer for 10 minutes; whisking frequently.
  3. Remove from heat and scoop a small amount into a bowl and store the rest in an airtight container in the fridge.
  4. Add in breast milk, formula, or fruit, if desired.  Serve warm.

Since this was my baby boy’s first solids, I stuck with 1 1/2 Tbsp. of cereal and 1 Tbsp. of cold breast milk (the cereal was still really hot so the cold breast milk cooled it off nicely).


My hubby strapped our baby boy into the highchair, put on an appropriate bib for the occasion and we were ready to go!

First bite…

…and the reaction…

Yeaaahhh, not the reaction I was looking for after the love and work I had put into this!  That’s o.k. though – it’s new…let’s try another bite.

This face made me chuckle 😀

Maybe I should have gone with plain brown rice instead of basmati.  Maybe the texture was off for him (it was a bit coarse).  Maybe it’s just new and we need to keep trying.  Maybe my baby boy just wants some darn brand-name, processed, plain ol’ rice cereal like his brother and sister had 😉

Let’s Get Crafty: Baby Nurseries!

When we found out that our first child was going to be a girl, wooden letters spelling out the baby’s name was just becoming popular…or maybe it had been but I wasn’t aware because it wasn’t something I had looked into.  I didn’t like the plain ol’ choices they had in stores so I went online (which I did a lot during my 11 weeks of bed rest) in search of pretty wooden letters for my baby girl.  Her room was lavender on the bottom part of the wall and a pale, sunny yellow on top so I wanted my husband to paint the letters the same lavender so they would pop off the yellow.  Through my search I found someone who sold different sizes with a lot of font choices and I chose a girly-looking one.  We painted them and hung them up with Command picture hanging strips.  I was so happy with what we had done!

For our second child, a boy, I could NOT decide on a theme for him.  Part of the problem was that we were living in a two-bedroom condo so he would be in our room, which was already painted a sage green.  I wanted to be crafty for him so I decided to buy one of those quilt panels that’s basically done besides sewing some binding around the edges.  He needed something to go with it though so I painted one of the animals for him to hang up.


Then, when my son was 5 1/2 months, we put our condo on the market and went in search of a new home.  We decided on new construction with 4 bedrooms and now I had to decide how I was going to do his first, very own room!  My sister had given him a quilt when he was baptized from Things Remembered and I decided to go with that and blue and yellow paint for his walls…but I needed accessories!  I painted two simple canvases for him and found star hooks, which I also painted, to hang his quilt from the wall.

We knew that we wanted a third child and had thought that since we already had a boy and a girl that the gender of this third child could be left a surprise!  On my son’s 2nd birthday, I found out I was pregnant with our third child 🙂  We went along telling everyone that we were gonna leave this one a surprise and I really wanted to…until it got closer to being able to find out and I was stressing about how to decorate the nursery and what kind of clothes to get…so we found out – it was time to start planning for our baby boy!

I wanted to do wooden letters spelling out his name like we had done for our daughter.  The wooden letter thing has really taken off and there were a lot of sites selling them already painted and/or decorated but I figured, “hey, I can do that!”  I found someone on Etsy that had wooden letters at a great price, different sizes and different fonts…and she was fast!

I had decided on Carter’s Tree Tops crib bedding, so now that I had a theme, I had to pick out some coordinating scrapbook paper.  Once again, I scoured the internet and bought my supplies from this site.  It really is easy to make your own coordinating letters for your little ones room!

Here is what you will need:

  • wooden letters
  • paint (if you choose to, you can paint the sides of the letters with the wall paint or another coordinating color)
  • scrapbook paper
  • Mod Podge (I used the gloss Mod Podge but you can also use the matte if you don’t want your letters to have a sheen)
  • small foam brushes
  • fine grit sandpaper
  • small scissors or craft knife
  • pencil

Here is what to do:

  • If you wish, sand the sides of the letters and paint
  • After they are dry, turn your scrapbook paper upside down and the letter you’re working with backwards and trace around the letter with a pencil (the paper and letter should be facing the correct way when turned over)
  • Cut out the paper just inside your pencil line using scissors or craft knife (I found it easier to use small, sharp scissors)
  • Apply a thin layer of Mod Podge onto the wooden letter with a foam brush and line up the paper letter over it and press it on and rub, rubbing out any air bubbles
  • Work on your other letters
  • Wait about 15 minutes and if there is any paper over the edge of the letters, lightly sand it off
  • Next, you can put your first coat of Mod Podge over the paper.  Make it as smooth as possible with your foam brush.
  • I put 2 coats of Mod Podge over the paper, making sure to let the first coat dry thoroughly (about 30 min).  I like the “brush” strokes that the foam brush leaves but if you would prefer yours smoother, then lightly sand between coats.
  • The surface will remain very slightly tacky…I didn’t mind but if you do then just spray with a clear acrylic.

Just as we did with our daughter’s, we hung the letters with the Command picture hanging strips.  Have fun!